
Halloween time again. Last year I tried to do a simple little hardware project to make my emoticon pumpkins glow. That’s cute and all but not very difficult.
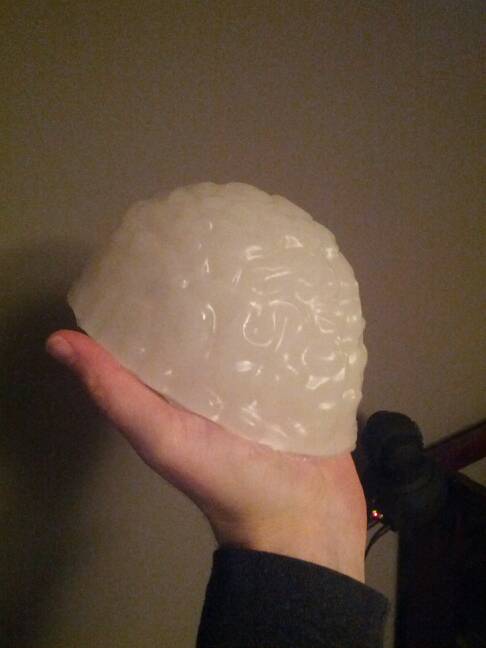
This year, I decided to work on this idea I’ve had for more than a year and a half. **The Brain – a silicone based brain with controllable LEDs inside. **I have some ideas of what to do next with it, but this first iteration is just to be a fun decoration for Halloween.
Back when Interlock was moving into their current space, there was this cool area in the center of it, that was surrounded by windows. That turned into the network room and I really wanted to use that window for something. Show something cool in the window or whatever. I came up with this idea that I would have a brain to represent network activity. When a host goes down, the brain reflects that. If there was no Internet connectivity, the brain would show that too. The first version of the brain is not to that level yet, but it’s in the right direction.
Brain 1.0 is a Platsil GEL-10, silicone brain with a hollowed center. In the center is a plastic project box housing an Arduino with Neo Pixels attached to it. A Neo Pixel is an Adafruit project that is meant to be a low cost, multi-color LED that you can daisy-chain, or string together in-line. There’s really no reason to use Neo Pixels for this project besides the fact that I had some already.
Parts:
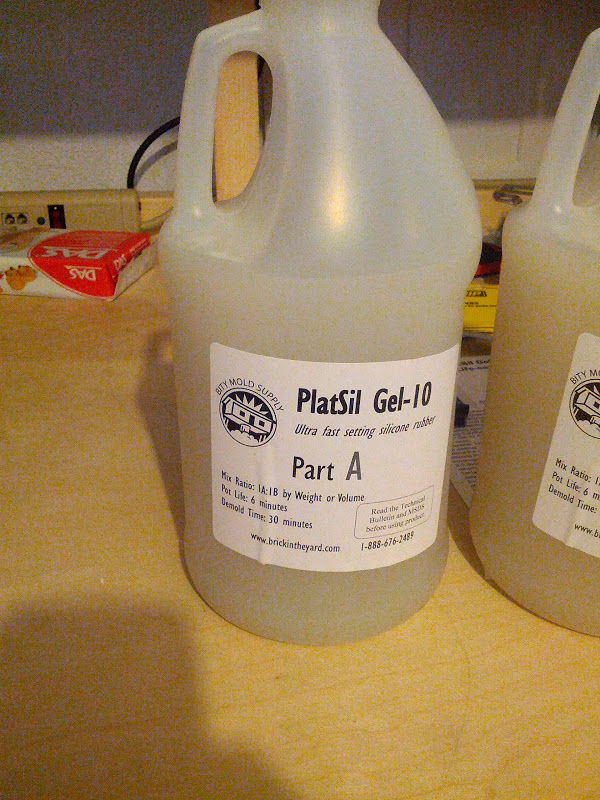
This was the most interesting part to me. I picked up the type of PlatSil that is a 1 to 1 compound either by volume or by mass so I didn’t need to worry about mixing too much. I took 500ML of A and mixed it with 500ML of B. This stuff has a 6 minute lifetime from the time you start mixing to the time it starts to harden. There are ways to slow this down, but again, I didn’t need to do that. I spent 2 minutes mixing because some guy on YouTube said this is important, and my recent adventures in Thermite taught me the lesson that they’re serious.
Before I poured it in, I used a can of Pol-Ease 2300 release which is used to keep the brain separated from the Jello mold. I was reminded the hard way what happens when you forget this. Pouring it into the mold was pretty simple but I made a small clay holder for it so I could make sure it stayed level. After the contents were dumped in, I sunk the plastic project container that was going to be my hollowed inside.
The whole things hardens within 30 minutes but because mine was in the garage in October, it was more like an hour.
Because this stuff isn’t very cheap, I did a demo mold just to make sure I was on the right track.
My goal was to create a mold of a brain that was rubbery and brain like. This Platsil line of chemicals are designed to create molds for other things. There wasn’t a lot of people making actual things from the material itself but I really like the texture and toughness of using it as the model. I will say that it is 100% overkill for what I wanted. There’s probably someone that can recommend a better, cheaper**,** alternative but for me this worked in the time frame I needed it to. They have a bunch of different types and I really wanted light to diffuse through it so I got that translucent version. It still comes out pretty white depending on how thick of a mold you’re making.
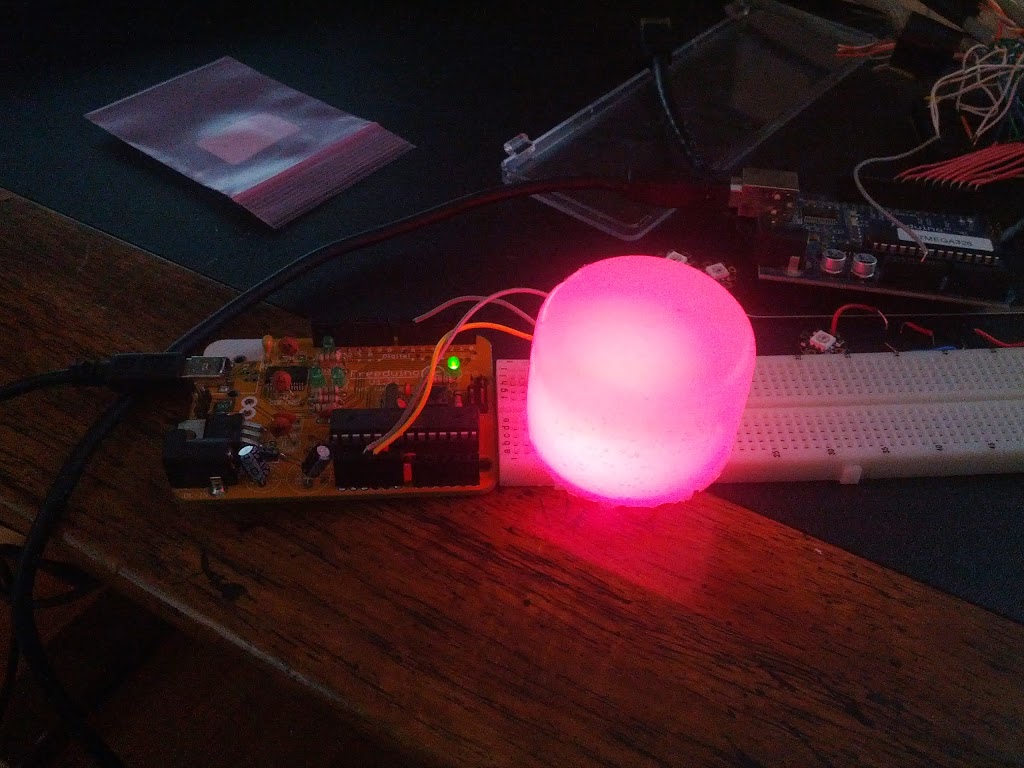
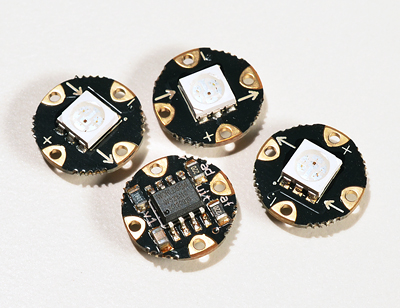
Neo Pixels are really slick. They have 4 leads on them. Power, Ground, signal in, and a signal out. The biggest benefit is that each pixel is individually addressable without the need for multiple connections. Pixel 0 connects to pixel 1 that connects to pixel N through a single wire connected to your microcontroller or whatever you’re using.
Power takes +5v, and there is a warning about memory consumption especially with smaller Arduinos and extremely long chains of Neo Pixels (up to 500 at 30 FPS). My 4 didn’t mind.
Adafruit has a Neo Pixel library that you can use pretty easily, even if you just want to hack one of their demos.
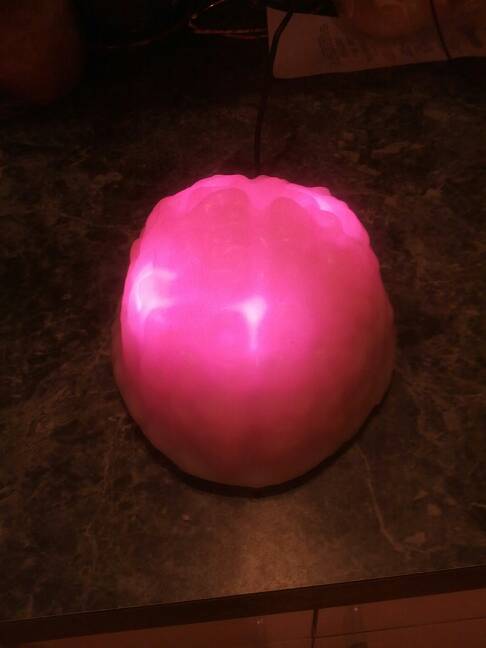
This is my hacked code to make the brain throb between red and pink. Again, a Neo Pixel is overkill for doing this but it’s fun none-the-less and I’ll be upgrading it next iteration.
#include <Adafruit_NeoPixel.h>
//Hacked from the original Adafruit library demo

#define PIN 6   //my control pin

// Parameter 1 = number of pixels in strip
// Parameter 2 = pin number (most are valid)
// Parameter 3 = pixel type flags, add together as needed:
//   NEO_KHZ800  800 KHz bitstream (most NeoPixel products w/WS2812 LEDs)
//   NEO_KHZ400  400 KHz (classic 'v1' (not v2) FLORA pixels, WS2811 drivers)
//   NEO_GRB     Pixels are wired for GRB bitstream (most NeoPixel products)
//   NEO_RGB     Pixels are wired for RGB bitstream (v1 FLORA pixels, not v2)
Adafruit_NeoPixel strip = Adafruit_NeoPixel(60, PIN, NEO_GRB + NEO_KHZ800);

void setup() {
  strip.begin();
  strip.show(); // Initialize all pixels to 'off'
}

void loop() {
  //Start out with a pink brain looking color
  colorWipe(strip.Color(255, 48, 48), 1); // Hot Pink

  //Throb read and then fade out
  heartThrob(20);
}

// Fill the dots one after the other with a color
void colorWipe(uint32_t c, uint8_t wait) {
  for(uint16_t i=0; i<strip.numPixels(); i++) {
      strip.setPixelColor(i, c);
      strip.show();
      delay(wait);
  }
}

void rainbow(uint8_t wait) {
  //secret rainbow mode
  uint16_t i, j;

  for(j=0; j<256; j++) {
    for(i=0; i<strip.numPixels(); i++) {
      strip.setPixelColor(i, Wheel((i+j) & 255));
    }
    strip.show();
    delay(wait);
  }
}

void heartThrob(uint8_t wait) {
  uint16_t i, j;

  //Adjust 60 and 90 to the starting and ending colors you want to fade between.
  for(j=60; j<90; j++) {
    for(i=0; i<strip.numPixels(); i++) {
      strip.setPixelColor(i, Wheel((i+j) & 255));
    }
    strip.show();
    delay(wait);
  }
}

// Input a value 0 to 255 to get a color value.
// The colours are a transition r - g - b - back to r.
uint32_t Wheel(byte WheelPos) {
  if(WheelPos < 85) {
   return strip.Color(WheelPos * 3, 255 - WheelPos * 3, 0);
  } else if(WheelPos < 170) {
   WheelPos -= 85;
   return strip.Color(255 - WheelPos * 3, 0, WheelPos * 3);
  } else {
   WheelPos -= 170;
   return strip.Color(0, WheelPos * 3, 255 - WheelPos * 3);
  }
}